

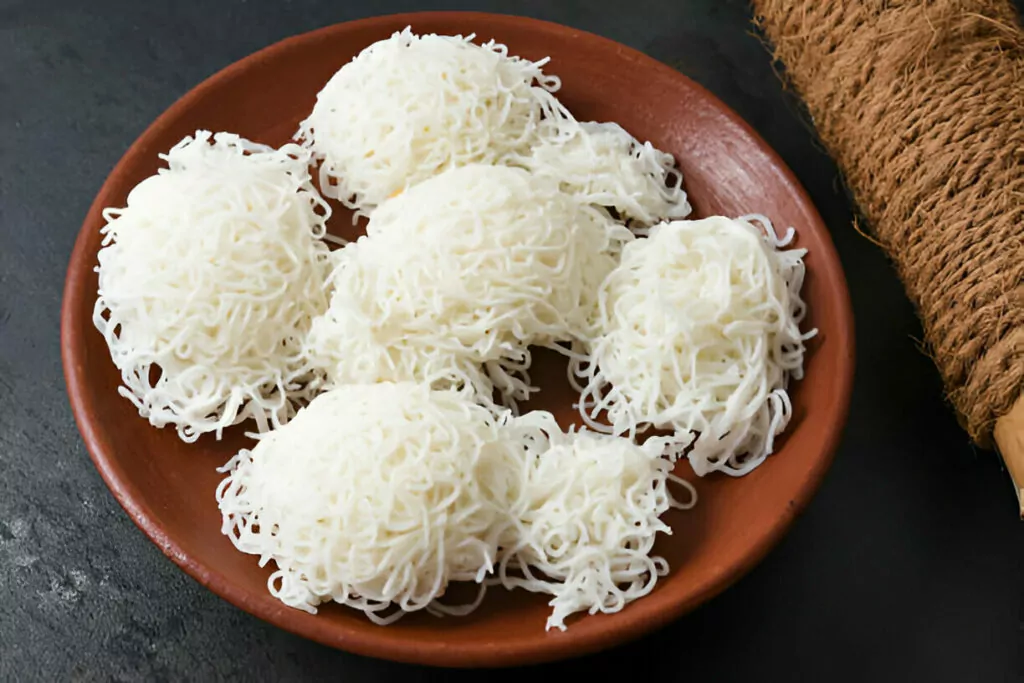
Soft, delicate, and subtly flavorful, Idiyappam is a traditional dish that transforms simple rice flour into intricate nests of steamed rice noodles. Made from scratch with minimal ingredients, it is a testament to the beauty of uncomplicated cooking. These lace-like noodle discs carry a gentle taste and airy texture, making them the perfect companion to rich curries or sweet accompaniments. Whether served for breakfast or dinner, Idiyappam brings a sense of comfort, tradition, and warmth to the plate.
Ingredient Overview
Idiyappam relies on just a few humble pantry staples, but each element plays a crucial role in achieving the perfect outcome. Rice flour forms the backbone of the dish. Selecting good-quality flour, finely milled and fresh, is key to creating soft, pliable dough that presses easily and steams beautifully.
The temperature of water used in kneading is just as important. The water must be hot—but not boiling—to coax the rice flour into a dough that’s neither sticky nor crumbly. The precise balance ensures a smooth consistency that is easy to press into thin strands.
A small pinch of salt enhances the natural flavor of the noodles, lending a gentle savory note. For those who wish to add depth and texture, grated coconut is a delightful optional addition. Its mild sweetness and richness provide a welcome contrast to the softness of the noodles, adding a layer of aroma and flavor that elevates the experience.
Step-by-Step Cooking Process
Before anything else, ensure your steaming setup is ready. Grease the idli moulds or steaming trays with a thin coating of oil. If you have banana leaves on hand, cut them into squares and place them on the moulds, brushing lightly with oil to prevent sticking. This not only aids in easy removal but also lends a subtle, earthy fragrance.
The first cooking step involves roasting the rice flour. Gently heat the flour over a low flame for a few minutes, stirring continuously. This process releases a faint aroma and steam—signaling that the flour is ready. Though it’s not meant to brown, this step helps in achieving a fluffier, softer texture once the flour is cooked into noodles.
In the same pan, bring water to a near-boil and stir in the salt. You want to stop just before it reaches a rolling boil—look for tiny bubbles along the edges. Pour this hot water into the bowl of roasted flour and mix swiftly with a spoon or spatula. As the temperature becomes bearable, knead the dough until smooth and pliable. The dough should be soft yet hold its shape. A dry dough can be remedied with a sprinkle of warm water, while stickiness can be adjusted with a touch of rice flour.
Once the dough is ready, grease your idiyappam press or murukku maker and fill it with a portion of the dough. Keep the remaining dough covered with a clean cloth to maintain its warmth and prevent drying. Press the dough in a circular motion directly onto the prepared moulds, creating delicate noodle nests. Work quickly while the dough is still warm and pliable.
Bring water to a boil in the steamer or pressure cooker. Once all moulds are filled, place them into the steamer. Cover tightly—if using a pressure cooker, remove the whistle beforehand. Steam for 9 to 10 minutes until the idiyappams turn soft and fully cooked. Allow them to rest briefly before serving, ensuring a delicate, well-set texture.
Recipe Tips & Frequently Asked Questions
How to keep the dough soft and manageable:
Always knead while the dough is warm. Cover unused dough with a damp cloth to prevent drying.
Best practices for lump-free dough:
Pour hot water gradually and stir swiftly. Ensure even mixing before kneading.
Preventing dough from drying out while working in batches:
Work in portions, and keep the remaining dough covered with a clean, moist kitchen towel.
Choosing between oil and water for greasing tools:
Both work well, though oil offers slightly smoother pressing. Avoid excess greasing to maintain grip.
How to store and reheat leftover idiyappam without losing softness:
Store in an airtight container and reheat gently by steaming or sprinkling with water and microwaving covered for a few seconds.
Can I use store-bought roasted rice flour?
Yes, but ensure it’s finely milled and fresh for best results.
Why is my dough too dry or too sticky?
This is often due to incorrect water ratios. Adjust by adding warm water or extra flour in small amounts.
What should I do if the dough hardens before pressing?
Gently knead again with a few drops of warm water to restore softness.
Can Idiyappam be frozen and reheated later?
Yes, freeze in airtight containers. Reheat by steaming to retain texture.
Is it necessary to use banana leaves?
What are the alternatives? Banana leaves add aroma and make removal easier, but greased idli moulds or parchment paper are excellent alternatives.
What to Serve With This Recipe
Idiyappam is a versatile base that absorbs flavor from whatever it’s paired with. For a savory meal, serve it with creamy vegetable kurma, coconut milk stew, or potato masala. Mushroom curry or lentil-based gravies also make wonderful companions, infusing each strand with rich, bold flavors.
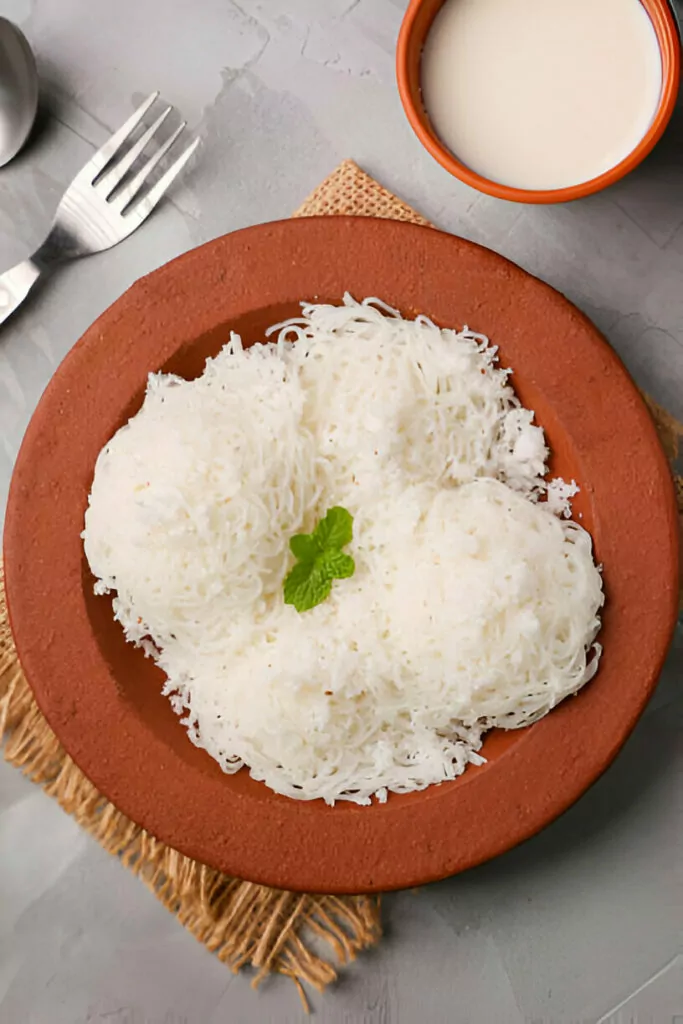
For those who enjoy a sweet twist, drizzle warm jaggery-sweetened coconut milk over the idiyappam. The velvety coconut milk, with hints of caramel from the jaggery, transforms it into a comforting dessert. A sprinkle of grated coconut mixed with sugar is another simple yet delightful option for a lightly sweet finish.
Texture Variations and Flavor Additions
The texture of idiyappam can be adjusted by slightly altering the dough consistency. A softer dough results in tender, melt-in-the-mouth noodles, while a firmer one gives a slightly chewy bite—perfect for soaking up gravies.
Enhance the flavor by incorporating finely chopped herbs or spiced infusions like cumin or crushed fennel seeds into the dough. For festive meals, consider layering the idiyappam with jaggery-coconut filling or adding flavored coconut toppings such as cardamom or nutmeg-scented mixtures.
Idiyappam brings elegance and tradition to the table with its fine strands and understated charm. It’s a dish that turns everyday ingredients into something memorable—gentle in flavor, rich in versatility, and perfect for pairing with a range of accompaniments. Whether served for a comforting breakfast or a hearty dinner, it captures the essence of home-style cooking in the most graceful way.
Ingredients
¼ teaspoon salt, or as needed
1.25 to 1.3 cups hot water (for kneading the dough)
1 cup rice flour (approximately 130 grams)
¼ cup freshly grated coconut (optional)
2 cups water (for steaming)
Instructions
Preparation
Lightly grease an idli plate or steaming tray with oil and keep it ready before you start. If available, use banana leaves cut into squares and place them on the idli moulds. Apply a thin layer of oil over the banana leaves to prevent sticking.
Roasting the Rice Flour
Place a heavy-bottomed pan or kadai over low heat and add the rice flour. Stir it continuously on a low flame for 4 to 5 minutes. The goal is not to brown the flour but to gently heat it until you see light steam rising—this enhances the softness of the idiyappams. Once you notice the steam, remove the pan from heat and transfer the roasted flour to a mixing bowl.
Preparing the Dough
In the same pan, pour 1.25 to 1.3 cups of water and add the salt. Heat the water gently—do not allow it to reach a rolling boil. As soon as you notice small bubbles forming and the water beginning to simmer, turn off the flame. Immediately pour the hot water over the roasted rice flour in the mixing bowl.
Using a spoon or spatula, stir the mixture thoroughly until it begins to come together. Once it’s warm enough to handle, knead it into a smooth, pliable dough. If the dough feels too dry, lightly sprinkle warm water and knead again. If it becomes sticky, add a small amount of rice flour and continue kneading until the desired texture is achieved.
Making Idiyappam
Lightly grease the idiyappam press or murukku maker with water or oil. In a separate pan or pressure cooker, bring 2 cups of water to a boil and keep it simmering on low to medium heat.
Divide the dough into two or three portions. Shape one portion into a cylindrical log and place it inside the greased idiyappam press. Keep the remaining dough covered with a clean kitchen towel to prevent it from drying out.
Press the dough directly onto the greased idli moulds in a circular, spiral motion to form nest-like discs. Ensure the dough remains warm while pressing—it becomes difficult to work with once it cools.
Repeat the process until all moulds are filled. Optionally, sprinkle a little grated coconut over each prepared idiyappam disc for added flavor and texture. Alternatively, you may choose to garnish with fresh coconut and a touch of sugar just before serving.
Steaming
Place the filled idli stand into the steaming pan or pressure cooker. If using a cooker, remove the whistle (vent weight) before covering it. Steam on medium to high heat for 9 to 10 minutes until the idiyappams are fully cooked and tender.
After steaming, allow them to rest in the covered pan for 1 to 2 minutes before removing the stand. Gently lift each idiyappam using a spatula. If you’ve used banana leaves, simply lift the leaves and serve.
If not serving immediately, transfer the cooked idiyappams to a covered casserole dish to keep them warm and soft.
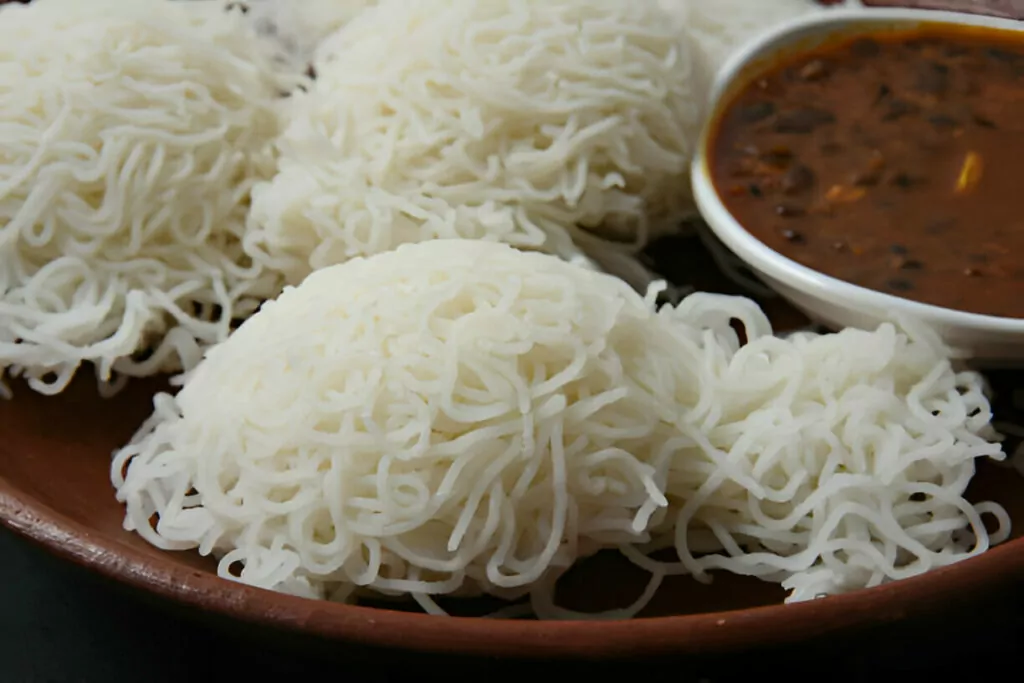
Serve these delicate rice noodles hot with accompaniments like vegetable kurma, potato stew, mushroom curry, or jaggery-sweetened coconut milk for a traditional and flavorful meal.

Idiyappam Recipe
Ingredients
- ¼ teaspoon salt or as needed
- 1.25 to 1.3 cups hot water for kneading the dough
- 1 cup rice flour approximately 130 grams
- ¼ cup freshly grated coconut optional
- 2 cups water for steaming
Instructions
Preparation
- Lightly grease an idli plate or steaming tray with oil and keep it ready before you start. If available, use banana leaves cut into squares and place them on the idli moulds. Apply a thin layer of oil over the banana leaves to prevent sticking.
Roasting the Rice Flour
- Place a heavy-bottomed pan or kadai over low heat and add the rice flour. Stir it continuously on a low flame for 4 to 5 minutes. The goal is not to brown the flour but to gently heat it until you see light steam rising—this enhances the softness of the idiyappams. Once you notice the steam, remove the pan from heat and transfer the roasted flour to a mixing bowl.
Preparing the Dough
- In the same pan, pour 1.25 to 1.3 cups of water and add the salt. Heat the water gently—do not allow it to reach a rolling boil. As soon as you notice small bubbles forming and the water beginning to simmer, turn off the flame. Immediately pour the hot water over the roasted rice flour in the mixing bowl.
- Using a spoon or spatula, stir the mixture thoroughly until it begins to come together. Once it’s warm enough to handle, knead it into a smooth, pliable dough. If the dough feels too dry, lightly sprinkle warm water and knead again. If it becomes sticky, add a small amount of rice flour and continue kneading until the desired texture is achieved.
Making Idiyappam
- Lightly grease the idiyappam press or murukku maker with water or oil. In a separate pan or pressure cooker, bring 2 cups of water to a boil and keep it simmering on low to medium heat.
- Divide the dough into two or three portions. Shape one portion into a cylindrical log and place it inside the greased idiyappam press. Keep the remaining dough covered with a clean kitchen towel to prevent it from drying out.
- Press the dough directly onto the greased idli moulds in a circular, spiral motion to form nest-like discs. Ensure the dough remains warm while pressing—it becomes difficult to work with once it cools.
- Repeat the process until all moulds are filled. Optionally, sprinkle a little grated coconut over each prepared idiyappam disc for added flavor and texture. Alternatively, you may choose to garnish with fresh coconut and a touch of sugar just before serving.
Steaming
- Place the filled idli stand into the steaming pan or pressure cooker. If using a cooker, remove the whistle (vent weight) before covering it. Steam on medium to high heat for 9 to 10 minutes until the idiyappams are fully cooked and tender.
- After steaming, allow them to rest in the covered pan for 1 to 2 minutes before removing the stand. Gently lift each idiyappam using a spatula. If you’ve used banana leaves, simply lift the leaves and serve.
- If not serving immediately, transfer the cooked idiyappams to a covered casserole dish to keep them warm and soft.
- Serve these delicate rice noodles hot with accompaniments like vegetable kurma, potato stew, mushroom curry, or jaggery-sweetened coconut milk for a traditional and flavorful meal.
