

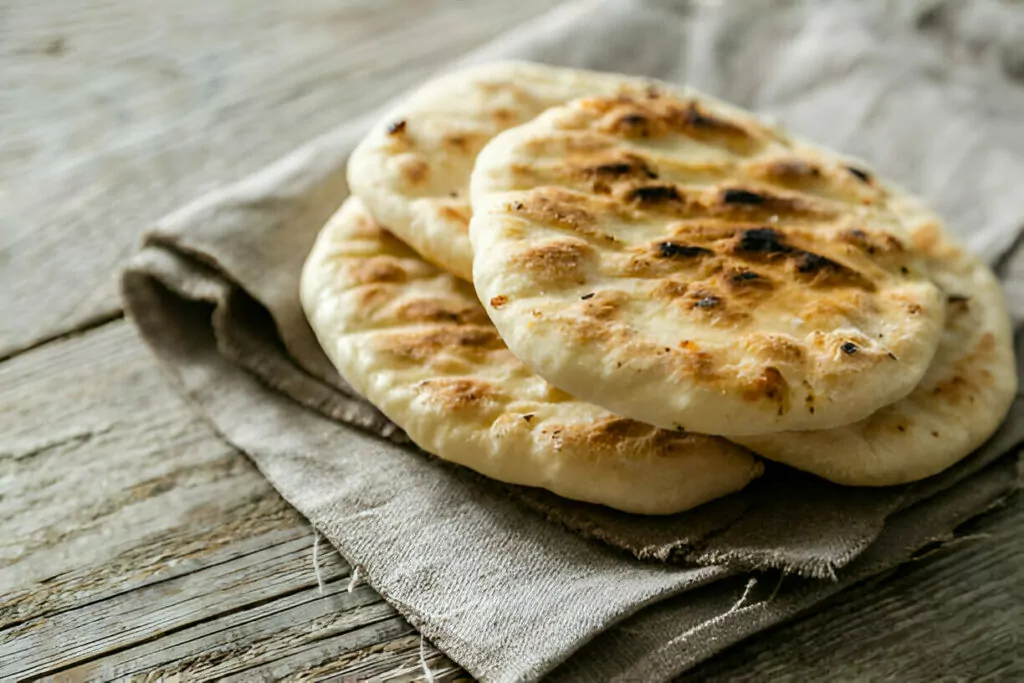
A warm, freshly made pita is a culinary delight that transforms even the simplest meal into something special. This homemade pita bread recipe yields soft, airy rounds with just the right amount of chew. Whether served alongside creamy dips, filled with flavorful fillings, or enjoyed straight from the pan, these pita breads bring a taste of the Mediterranean to your kitchen. With minimal ingredients and straightforward steps, this recipe makes it easy to create bakery-quality pita at home.
Ingredients Overview
The success of pita bread relies on a few simple ingredients, each playing a crucial role in achieving the perfect texture and flavor. Dry instant yeast is the leavening agent responsible for creating the characteristic puff and airy pockets in pita. Activating the yeast with lukewarm water ensures optimal fermentation, allowing the dough to rise effectively. A touch of sugar provides the yeast with the necessary fuel to activate quickly, while salt enhances the overall flavor and controls the fermentation process.
Flour selection significantly impacts the texture of the final product. Strong white bread flour yields a softer, more elastic dough, while a 50-50 blend of white and whole-wheat flour introduces a slightly nutty flavor and a heartier texture. Adjusting flour ratios can tailor the pita to personal preferences. If using whole-wheat flour exclusively, additional hydration and kneading time may be needed to maintain the dough’s elasticity.
Step-by-Step Preparation
The foundation of perfect pita begins with activating the yeast. Lukewarm water, ideally at 40°C (104°F), is key to dissolving the yeast while maintaining an ideal environment for fermentation. When mixed with sugar and left to rest, the yeast should become frothy within 5–10 minutes. If the mixture remains flat, the yeast may be expired, or the water temperature may be too high or too low.
Once the yeast is active, flour and salt are gradually incorporated to form a cohesive dough. Using a stand mixer fitted with a dough hook streamlines the kneading process, developing gluten efficiently in about 6–8 minutes. The dough should become smooth, elastic, and slightly tacky. For those kneading by hand, the process may take slightly longer, but the goal remains the same—achieving a supple, pliable dough that stretches without tearing. Adjustments in flour quantity may be necessary depending on humidity levels and flour type.
Allowing the dough to proof is essential for achieving soft and airy pita. Placing the dough in a lightly oiled bowl, covering it, and letting it rise in a warm, draft-free area ensures proper fermentation. In colder climates, a pre-warmed oven can act as an improvised proofing box. Once doubled in size, the dough is deflated gently before being divided into six equal portions. Rolling each portion into a smooth ball and allowing a second brief rest period helps the gluten relax, making shaping easier.
When it comes to forming the pita, the choice between rolling and hand-stretching affects the final texture. A rolling pin creates uniform, crisp-edged pita, while hand-stretching produces a softer, fluffier texture. If the dough resists stretching, letting it rest for a few minutes before continuing prevents tearing and improves elasticity. Traditional dimples can be created by pressing fingertips into the dough, or small holes can be made with a fork to control air pockets.
Cooking methods further influence the final pita texture. Using a non-stick pan on medium heat creates a lightly charred exterior while preserving the soft chew inside. Cooking each pita for about 3 minutes per side, flipping when bubbles appear, ensures even cooking. Covering the pan with a lid helps retain moisture, preventing the pita from drying out.
For an ultra-soft and pillowy texture, the steam method is an excellent alternative. A piece of oiled aluminum foil acts as a barrier between the pita and the pan, while a splash of water generates steam. Covering the pan traps the steam inside, allowing the pita to cook gently for 12–15 minutes before being flipped for a final crisping. Pressing lightly with a wooden spoon encourages even browning.
Recipe Tips & Frequently Asked Questions
How to prevent the dough from becoming too dry or sticky:
Adjust water or flour gradually while kneading to achieve a soft yet manageable consistency.
The impact of different flours on the final result:
Whole wheat adds depth and a denser texture, while all-white flour ensures a lighter, airier pita.
Tricks to keep pita bread soft and pliable after cooking:
Wrapping freshly cooked pita in a clean towel helps retain moisture and prevents hardening.
Why didn’t my pita puff up?
Ensure the dough is adequately proofed, rolled evenly, and cooked at the correct temperature for proper steam formation.
Can I bake pita bread instead of cooking it on a pan?
Yes, baking at a high temperature (475°F/245°C) on a preheated baking stone can create beautifully puffed pitas.
How do I make gluten-free pita?
A blend of gluten-free flours with xanthan gum can mimic the structure of wheat-based dough, though texture may vary.
Can I prepare the dough ahead of time and refrigerate it?
Yes, the dough can be refrigerated overnight and brought to room temperature before shaping and cooking.
What to Serve With This Recipe
Homemade pita is incredibly versatile, pairing well with a wide range of dishes. Classic Mediterranean dips such as hummus, baba ganoush, and tzatziki complement the soft, warm bread perfectly. For a heartier meal, pita can be stuffed with grilled meats, falafel, or roasted vegetables, transforming it into a satisfying sandwich or wrap.
Beyond traditional uses, pita can be sliced and toasted to create crisp pita chips, ideal for dipping into salsas or creamy cheese spreads. It also serves as a base for easy personal-sized pizzas, topped with tomato sauce, fresh herbs, and cheese before a quick bake.
Storage and Reheating Tips
To maintain freshness, store pita bread in an airtight container at room temperature for up to two days. For longer storage, wrap individual pitas in plastic wrap and freeze in a resealable bag for up to a month. When ready to eat, thaw at room temperature and reheat in a warm pan or low oven to restore softness.
If pita bread has become slightly dry, lightly misting it with water before reheating can help revive its original texture. Avoid microwaving for extended periods, as this can make the bread tough and chewy.
Mastering homemade pita bread is a rewarding experience that brings authentic, bakery-style results to your kitchen. With a few simple techniques and the right ingredients, this recipe delivers a perfect balance of softness and chew, making it a staple for any meal. Whether enjoyed fresh, toasted, or stuffed with flavorful fillings, pita bread is a delicious and versatile addition to any table.
Ingredients
3 teaspoons dry instant yeast
1 teaspoon salt
1 teaspoon sugar
360g (12.7 oz.) lukewarm water (40°C/104°F)
500–530g (17–18.5 oz.) strong white bread flour (or a blend of 50% white and 50% whole-wheat flour)
Instructions
In the bowl of a stand mixer, combine the yeast, sugar, and lukewarm water. Stir gently until the yeast dissolves completely. Allow the mixture to rest for 5–10 minutes, giving the yeast time to activate and become frothy.
Gradually add the flour and salt to the yeast mixture. Using a dough hook attachment, mix on a medium setting for 6–8 minutes until the dough comes together into a soft, slightly sticky, and elastic ball. If kneading by hand, mix the ingredients in a large bowl before transferring the dough to a floured surface and kneading until smooth. Depending on the flour used, slight adjustments may be necessary—if the dough feels too dry, add a teaspoon of water; if too wet, incorporate a bit more flour.
Once the dough reaches the right consistency, lightly coat it with olive oil and place it in a clean mixing bowl. Cover with plastic wrap and a kitchen towel, setting it in a warm spot for at least 20 minutes or until it doubles in size. This initial proofing step is crucial for creating soft, airy pita bread. During colder months, pre-warming the oven for a minute or two, then switching it off, provides a cozy environment for the dough to rise effectively.
Gently punch down the risen dough to release air pockets, then transfer it to a lightly floured surface. Divide into six equal portions, approximately 145g (5 oz.) each. Lightly dust with flour if necessary and shape them into smooth balls. Let them rest for 15 minutes, allowing the gluten to relax, which will make shaping easier.
For forming the pita, use either a rolling pin or your hands to stretch each dough ball into a round approximately 20cm in diameter. Rolling with a pin yields a crispier texture, while hand-stretching results in a softer, more pillowy pita. If the dough resists shaping, let it rest briefly before trying again. For a more traditional appearance, press the dough with your fingertips to create dimples or use a fork to prick small holes across the surface.
To cook the pita, preheat a non-stick frying pan over medium heat. Lightly brush the pan with olive oil, ensuring no excess remains. Cook each pita for about 3 minutes on each side, flipping when golden brown but still soft. For added moisture retention, cover the pan with a lid while cooking.
For a fluffier, more tender texture, use the steam method. Cut a piece of aluminum foil to fit the pan and coat it generously with olive oil. Place a shaped pita onto the foil. Add 2–3 tablespoons of water to the heated pan—this should generate steam immediately. Quickly place the pita-covered foil into the pan, then cover with a lid. Let it steam for 12–15 minutes before flipping and cooking for another 2–3 minutes. Lightly pressing down with a wooden spoon during the final minutes enhances browning.
Once cooked, transfer the pita to a clean towel and wrap loosely to retain warmth and softness. Serve fresh or store in an airtight container for later use.

Pita Bread Recipe
Ingredients
- 3 teaspoons dry instant yeast
- 1 teaspoon salt
- 1 teaspoon sugar
- 360 g 12.7 oz. lukewarm water (40°C/104°F)
- 500 –530g 17–18.5 oz. strong white bread flour (or a blend of 50% white and 50% whole-wheat flour)
Instructions
- In the bowl of a stand mixer, combine the yeast, sugar, and lukewarm water. Stir gently until the yeast dissolves completely. Allow the mixture to rest for 5–10 minutes, giving the yeast time to activate and become frothy.
- Gradually add the flour and salt to the yeast mixture. Using a dough hook attachment, mix on a medium setting for 6–8 minutes until the dough comes together into a soft, slightly sticky, and elastic ball. If kneading by hand, mix the ingredients in a large bowl before transferring the dough to a floured surface and kneading until smooth. Depending on the flour used, slight adjustments may be necessary—if the dough feels too dry, add a teaspoon of water; if too wet, incorporate a bit more flour.
- Once the dough reaches the right consistency, lightly coat it with olive oil and place it in a clean mixing bowl. Cover with plastic wrap and a kitchen towel, setting it in a warm spot for at least 20 minutes or until it doubles in size. This initial proofing step is crucial for creating soft, airy pita bread. During colder months, pre-warming the oven for a minute or two, then switching it off, provides a cozy environment for the dough to rise effectively.
- Gently punch down the risen dough to release air pockets, then transfer it to a lightly floured surface. Divide into six equal portions, approximately 145g (5 oz.) each. Lightly dust with flour if necessary and shape them into smooth balls. Let them rest for 15 minutes, allowing the gluten to relax, which will make shaping easier.
- For forming the pita, use either a rolling pin or your hands to stretch each dough ball into a round approximately 20cm in diameter. Rolling with a pin yields a crispier texture, while hand-stretching results in a softer, more pillowy pita. If the dough resists shaping, let it rest briefly before trying again. For a more traditional appearance, press the dough with your fingertips to create dimples or use a fork to prick small holes across the surface.
- To cook the pita, preheat a non-stick frying pan over medium heat. Lightly brush the pan with olive oil, ensuring no excess remains. Cook each pita for about 3 minutes on each side, flipping when golden brown but still soft. For added moisture retention, cover the pan with a lid while cooking.
- For a fluffier, more tender texture, use the steam method. Cut a piece of aluminum foil to fit the pan and coat it generously with olive oil. Place a shaped pita onto the foil. Add 2–3 tablespoons of water to the heated pan—this should generate steam immediately. Quickly place the pita-covered foil into the pan, then cover with a lid. Let it steam for 12–15 minutes before flipping and cooking for another 2–3 minutes. Lightly pressing down with a wooden spoon during the final minutes enhances browning.
- Once cooked, transfer the pita to a clean towel and wrap loosely to retain warmth and softness. Serve fresh or store in an airtight container for later use.
